How-to: Headless Pi easy setup
Raspberry Pi, SD card, PSU, card reader and a laptop with WiFi and Internet – set up and deploy without ever using any local peripherals (unless you can call its power supply a peripheral)
While this set of instructions is easily found all over the web I’ve put it in one place for my own reference. Use it if you like, I will be – repeatedly.
Steps
- Image your SD card
- Enable SSH and a WiFi connection
- Boot the Pi
- Connect over WiFi and login
- Setup a few basics
- Start using your headless Pi
Instructions
1. Image your SD card
- Download Raspberry Pi Imager (I used v1.3 from here) and install it.
- Plug in your SD card reader
- Insert your SD card
- Run Raspberry Pi Imager and click Choose OS
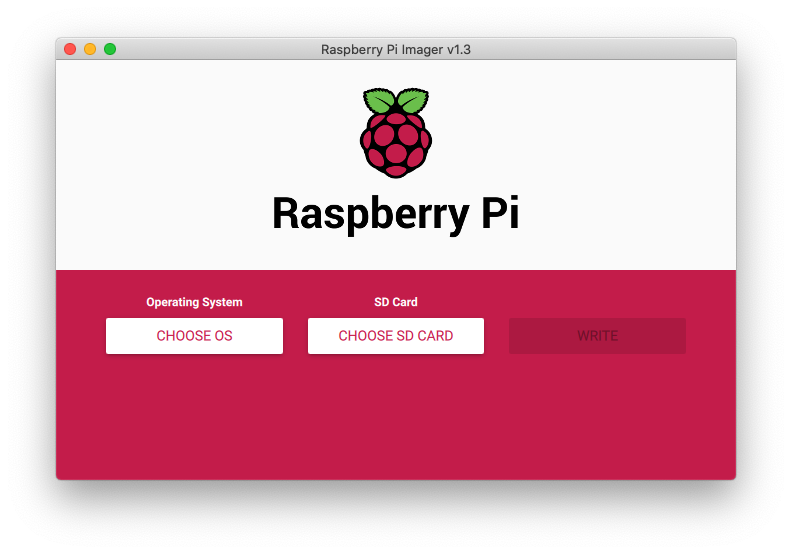
- Select “Raspberry Pi OS Lite (32-bit)”
- Click Choose SD card and select the SD card from the list that appears
- Click Write
- Allow the utility to write the image to the SD card
- Allow the utility to verify the image on the SD card
- When it tells you to remove the card, remove it
2. Enable SSH and a WiFi connection
- Re-insert the SD card into the card reader then open the drive – it should be named “boot”
- Create an empty text file with no extension, save it in the root level/folder of the “boot” volume, call it “SSH” (without the quotes)
- Create another empty text file in the same root folder and call it wpa_supplicant.conf
- Edit your new wpa_supplicant.conf file and copy the following into it
ctrl_interface=DIR=/var/run/wpa_supplicant GROUP=netdev
update_config=1

network={
    ssid="<INSERT YOUR SSID>"
    psk="<INSERT YOUR KEY>"
    id_str="home"
}- Edit your new wpa_supplicant.conf file to replace <SSID> and <KEY> with your wireless network name (SSID) and its password (KEY) – keep the quotes
- Save and close the file
- Properly eject the SD card
3. Boot the Pi
- Insert the SD card into the Pi
- Plug the Pi into a suitable power supply
4. Connect over WiFi and login
In order to connect over WiFi you will need to know the IP address of your Pi. There are a number of ways to do this depending on what tools you have available and what your WiFi router/access point can tell you.
I use isc-dhcp-server running on an Ubuntu Linux box so I log into that and issue a dhcp-lease-list command which lists all address leases on the network. It’s a relatively easy task to compare the list from before booting the Pi to the list afterwards to find the entry that relates to the newest host called “raspberrypi”.
You may find that entry easy to find in your router’s DHCP table. Alternatively, you may be able to scan your network for IP addresses in use – especially if you scan for open ports numbered “22” with a tool such as the Angry IP Scanner available here.
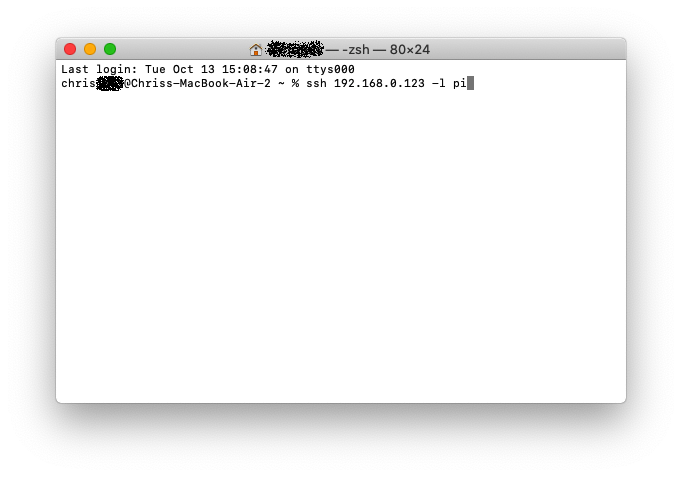
Once you know the IP address open a command line terminal (on MacOS simply use searchlight to open “Terminal”)
on Windows open the Command Prompt tool from the start menu
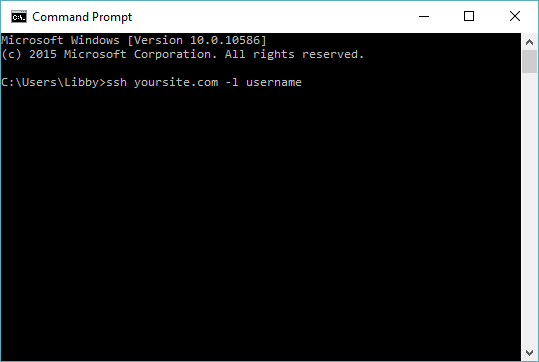
and type
ssh <ip-address> -l pireplacing <ip-address> with the IP address you discovered above
On pressing ENTER you may be asked whether you want to add a key to your hosts file – reply “yes” and press ENTER again.
You should now be connected to your Raspberry Pi and looking at a prompt asking for the password for the user “pi”. By default, at the time of writing, the password for this installation of Raspbian is “raspberry” – type it without the quotes and press ENTER.
You should be successfully connected in an SSH session and looking at a prompt that says something like
pi@raspberrypi:~ $5. Setup a few basics
Your Raspberry Pi is ready to use but I’d advise doing the following before getting started on your first project:
- change the hostname
- change the default password from “raspberry” – now you’ve enabled SSH anyone who knows the Raspberry Pi world knows that username-password combination
- change the default username from “pi”
- update all installed software versions
To change the hostname, type
sudo raspi-configSelect 2 from the menu that appears, then accept the warning with ENTER before deleting “raspberrypi” as the current hostname and entering something more meaningful like “server1” or “myserver”. Press ENTER then select <Finish> using the cursor keys and <Yes> to reboot.
Log back in as before using the same password
ssh <ip-address> -l piThen change the username to something that means something to you. To do so requires you to log into the Pi using an account that’s not the one you want to rename, so we’ll need to enable the root account for ssh login:
sudo passwd rootand set a password by following the prompts on screen. Remember the password.
Then, to edit the SSH configuration, type
sudo nano /etc/ssh/sshd_configAnd add a line in the “Authentication” section of the file as follows:
PermitRootLogin yesNext, exit the nano editor with Ctrl + X, answer “yes” to save and ENTER to overwrite the same filename. Then restart SSH and log out:
sudo systemctl restart sshd
logout
Log back in but this time as root, using the password set above:
ssh <ip-address> -l rootAnd change the username of the “pi” account to one of your choosing. Remember it:
usermod -l <yourname> piIf an error is received because the pi user is running a process: “User pi is current used by process nnn” then kill the process and run the command again:
kill nnn && usermod -l <yourname> piNext rename the home folder to match the new username, and logout:
usermod -m -d /home/<yourname> <yourname>
logout
Log back in using the newly-named account and the same password as when the account was called “pi” (likely still “raspberry”):
ssh <ip-address> -l <yourname>Then change the password by following the prompts shown after typing the command below (remember the password you choose):
passwdFinally, disable root access to leave the system a little more secure by editing the previously added line to comment it out:
sudo nano /etc/ssh/sshd_configComment out by changing the “PermitRootLogin yes” to:
#PermitRootLogin yesor just delete it altogether. Exit nano and save as above, and restart SSH so the changes take effect:
sudo systemctl restart sshdAt this stage I also usually ensure everything is up-to-date:
sudo apt update
sudo apt upgrade
sudo apt full-upgrade
Finally, I like to set a reservation on my DHCP server so that the Pi always gets the same IP address. That’s beyond the scope of this post but you could try “Googling DHCP reservation on <your router type>”
Your headless Raspberry Pi is ready to go
If you need to disable WiFi edit the boot config file:
sudo nano /boot/config.txtto include the following line in the [all] section
dtoverlay=disable-wifiYou’ll need to reboot for it to take effect:
sudo reboot
5 Replies to “How-to: Headless Pi easy setup”